
 Sessionize
 Aviva Solutions
 Fluent Assertions
Why every .NET library deserves a proper start
Starting a new library is not as simple as it looks
Every time I start a new library, I’m tempted to just create a project, add a class and a test, and push it to GitHub. What could possibly be difficult about that? Well, quite a lot actually. In that first hour, you also decide which frameworks you support, how you’re going to version your packages, how you build and publish them and what you consider to be good code in that repository. And in my experience, almost nobody goes back to change those decisions later on. You just live with them.
I know this, because I’ve been maintaining Fluent Assertions for more than 15 years now. It has more than half a billion downloads, and pretty much every line in its build script, every analyzer rule and every GitHub workflow exists because something went wrong at some point. So when I started working on Reflectify, Pathy, PackageGuard and Mockly, I ended up copying all of that stuff again. And again. And every single time I forgot something.
That’s why I built the .NET Library Starter Kit. In my first post about it, I mostly listed what’s in it. This time I want to explain why I think it works so well, and what I changed since then.
Pick your flavor
The kit is nothing more than a bunch of dotnet new templates. You install them once like this:
dotnet new install DotNetLibraryPackageTemplates
After that, you only need to answer two questions. Is your library going to be open-source or is it meant for internal use only? And do you want to build a normal binary package or a source-only package? Each combination has its own template:
dotnet new oss-nuget-class-library-sln --name MyLibrary
dotnet new oss-source-only-nuget-class-library-sln --name MyLibrary
dotnet new nooss-nuget-class-library-sln --name MyLibrary
dotnet new nooss-source-only-nuget-class-library-sln --name MyLibrary
And if your company is still using Azure DevOps, there are azdo- versions as well. Those need the name of your organization and project as extra parameters.
I think the source-only packages are underrated. A normal NuGet package contains DLLs. If two of your packages depend on different versions of the same DLL, you’ll end up with the so-called diamond dependency problem, and you don’t want to be the one who has to solve that. A source-only package contains the C# files instead. When you add it to a project, those files are compiled into that project as if you wrote them yourself. For small utility libraries, this is a much better approach. That’s exactly why Reflectify and Pathy are distributed like that.
Don’t exclude anybody
For an application, targeting only the latest version of .NET is fine. But for a library, it means you exclude a lot of people that are still on older versions. So by default, the templates target .NET Standard 2.0 and 2.1, .NET Framework 4.7 and a recent version of .NET. You can remove the ones you don’t need, but I prefer to start from the widest reach and remove things, not the other way around.
You may wonder whether that means you can’t use any of the modern C# features. Fortunately not. The kit uses PolySharp, which generates the missing attributes and types during compilation. So you can write modern C# and still support those old runtimes.
Quality from the very first commit
Did you ever try to add a Roslyn analyzer to an existing code base? I did. You enable one rule and you suddenly get 800 warnings. Nobody feels like fixing those, so after a week somebody disables the rule again and everybody moves on.
That’s why the kit enables everything from the start. It includes StyleCop Analyzers, Roslynator, Meziantou and the CSharpGuidelinesAnalyzer that checks the C# Coding Guidelines. All rules are configured in the .editorconfig with defaults that I believe work for most teams. And to keep your build times reasonable, the analyzers only run for one of the target frameworks.
Formatting follows the same idea. The .editorconfig and the .DotSettings file are honored by JetBrains Rider and ReSharper. I really don’t want to discuss curly braces in a pull request anymore. I’d rather spend my review time on the design and the behavior of the code.
Your public API is a promise
In an application, changing the signature of a public method is just refactoring. In a library, it’s a breaking change. Somebody updates your package and their code doesn’t compile anymore. And trust me, they will let you know.
So the generated solution contains an ApiVerificationTests project. It uses Verify to write the entire public API of your library to a text file, one for each target framework, and stores those in the ApprovedApi folder. If the public API changes, the test fails. If that change was intentional, you run AcceptApiChanges.ps1 to update the snapshot. If you use Rider, the Verify Support plug-in by Matthias Koch can do that for you from inside the IDE.
What I really like about this is that API changes become visible in the pull request. The reviewer sees the diff of the snapshot and immediately understands that this change will affect the people using the library.
A build script you can actually debug
I have nothing against YAML for describing when a pipeline should run. But I really dislike using it to describe how to build, test and package my code. You can’t debug it, you can’t refactor it and you usually find out it’s broken only after you pushed your changes. How many “Fix build” commits have you seen in your career?
The kit comes with a C# build script based on Fallout. The same script runs on your own machine and in the GitHub Actions workflow. You can start it using build.ps1, build.sh or build.cmd. Add --plan to see which steps it’s going to execute, or --help to see all the options. And if something fails in the pipeline, you can just run it locally and put a breakpoint in it.
Stop thinking about version numbers
Picking version numbers by hand works fine until somebody releases a breaking change as a patch version. I’ve seen it happen more than once. That’s why the kit uses GitVersion to calculate the semantic version from your Git history, and the build script will tag the commit after a successful release.
The release notes are handled in a similar way. The repository contains a configuration for GitHub release notes that groups your pull requests based on their labels. So a pull request with the breaking change label ends up in the section about breaking changes. The only thing you need to do is to label your pull requests properly.
A small warning though. Make sure you commit the generated code before you run the build for the first time. GitVersion needs at least one commit to calculate a version, and without it, the build will fail.
Know what you’re pulling in
Every package you depend on also becomes a dependency of the people using your library. So if one of your dependencies has a known vulnerability or a license that doesn’t allow commercial use, that’s not just your problem anymore.
The kit enables the NuGet auditing that is built into .NET. This means that a dotnet restore will fail if one of your dependencies has a known vulnerability. The README explains what you can do about those warnings. On top of that, the build runs PackageGuard to check the licenses of all your dependencies against a policy. I explained how PackageGuard works in a recent post.
Built for other people
A library is only reusable if other people can understand it and contribute to it. That’s obviously true for open-source projects, but it’s just as true for internal libraries that you share across teams using Inner Sourcing, which simply means applying the open-source way of working inside your company.
So the templates also give you an extensive README with sections for the purpose, how to install and build it, who contributed and which other projects it depends on. You’ll also get a CONTRIBUTING.md based on everything I learned from maintaining Fluent Assertions, a code of conduct and GitHub issue templates for bug reports and feature requests. The test project uses xUnit and Fluent Assertions 7, and its name ends with Specs. I did that on purpose. To me, tests are specifications of the behavior of your code. They are not something you add afterwards to reach a code coverage percentage.
Make it yours
I don’t expect everybody to agree with all my choices. Maybe you prefer another test framework, or you don’t want to report code coverage to Coveralls.io. That’s perfectly fine. The kit is MIT licensed, so you can fork it, change whatever you want and publish it as the template for your own company. You can even turn it into a GitHub template repository. In my opinion, that’s the most effective way to get consistent standards across many teams. Instead of writing a guideline document that nobody reads, you make those standards the starting point of every new library.
What changed since last year
Since I wrote my first post about the kit, I made a couple of changes:
- The build script moved from Nuke to Fallout.
- The solution uses the new
.slnxformat instead of the old.slnfile. - The test project now uses Fluent Assertions 7.
-
PackageGuard is now a fixed part of the build.
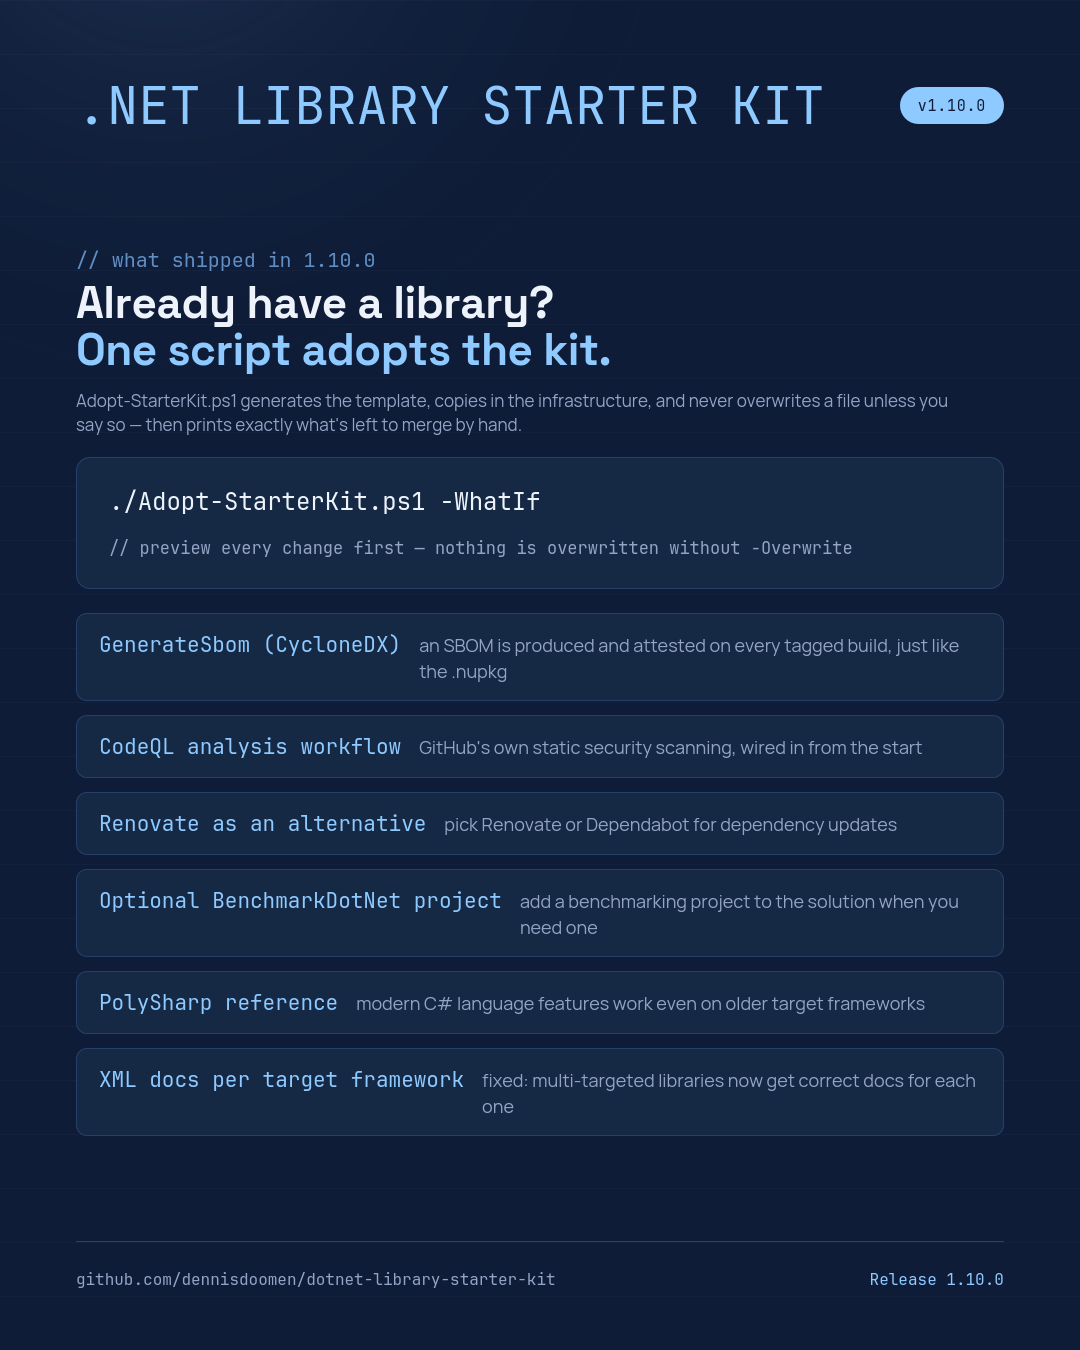
- Version 1.10.0 adds an SBOM (CycloneDX) that is produced and attested on every tagged build, just like the
.nupkg. - A CodeQL analysis workflow gives you GitHub’s own static security scanning from the start.
- You can choose Renovate instead of Dependabot to keep your dependencies up to date.
- You can add an optional BenchmarkDotNet project to the solution when you need one.
- The kit references PolySharp, so modern C# language features work on older target frameworks.
- Multi-targeted libraries now get a correct XML documentation file for each target framework. This was a bug before.
Already have a library?
You don’t need to start from scratch. Adopt-StarterKit.ps1 generates the template, copies the infrastructure into your repository and never overwrites a file unless you tell it to. After that, it prints exactly which files are left for you to merge by hand. I recommend previewing the changes first:
./Adopt-StarterKit.ps1 -WhatIf
Nothing is overwritten without -Overwrite.
If you already installed the templates, you can get these changes by running dotnet new update.
Give it a try
Install the templates, create an empty Git repository and run one of the commands I showed you. Commit the result, run build.ps1 and have a look at the Artifacts folder. You’ll find a NuGet package that is ready to be published. And if you think something is missing or you have a better idea, please open an issue or send me a pull request. You can guess where to find the contribution guidelines.
About me
I’m a Microsoft MVP and Principal Consultant at Aviva Solutions with 30 years of experience under my belt. As a coding software architect and/or lead developer, I specialize in building or improving (legacy) full-stack enterprise solutions based on .NET as well as providing coaching on all aspects of designing, building, deploying and maintaining software systems. I’m the author of Fluent Assertions, PackageGuard, Mockly, Pathy, Reflectify, the .NET Library Starter Kit and I’ve been maintaining coding guidelines for C# since 2001. You can find me on Twitter, Mastodon and Blue Sky.
Leave a Comment